
 Video modeling involves the use of video recording as a teaching tool. It involves a student watching a video of the appropriate performance of a task (expected behavior) prior to practicing or potentially using the skill in natural settings. The combination of a) watching correct performance and b) repeated practice promote development of the targeted skill. The video provides a clear model of how to do something, presenting an illustrated example to help clarify the steps necessary to produce the desired outcome.
The video may illustrate any expected behavior:
- Waving and saying, “Hello.”
- Smiling
- Shaking hands
- Leaving a noisy area when over-stimulated
- Raising a hand to ask for help
- Washing hands in the restroom
- Introducing yourself
The video may also illustrate a sequence of behaviors, if the sequence is within the capacity of the student.
Moreover, video modeling can illustrate a variety of expected social-communication behaviors:
- Vocal tone
- Voice volume
- Focal direction (where you are looking)
- Body language
- Facial expression
- What was said?
- How did you feel?
Seeing one’s self from an outside perspective can really help clarify what to do and how to do it. Since individuals often have difficulty taking the perspectives of others, video-modeling offers them the opportunity to see themselves from the outside. Research suggests that the performer in the video may either be the student himself or someone else. Simply, watching correct performance improves the likelihood of success in later actual performance.
It is important that you, as the instructor, are not overwhelmed by using video technology in your teaching. With the advancements in commercial technology, video modeling is an under-utilized but easy-to-use tool to engage students. How often do you use your smart phone or handheld camera to capture a child’s birthday party or your friends on the beach? If you have ever used such devices to record an event, you have already mastered a major portion of video modeling! Step-by-step instructions are provided in the “How?” section to help guide your process of using this technique with your students.
Why should I use video modeling?
Video modeling can be used to teach new skills, to reduce maladaptive behaviors, and to promote generalization.
 Teaching New Skills
- Teach specific skills (ex: logging onto a computer)
- Chain skills to complete complex tasks (ex: logging onto a computer, opening a specific program and beginning work)
- Use adaptive equipment
- Practice relaxation techniques
Reducing Maladaptive Behaviors
- Reduce prompt-dependence and promote independent task completion (ex: completing steps of a task without checking in for prompts from others)
- Reduce disruptive behaviors (ex: blurting out in class, talking to self while working )
- Lower voice volume to appropriate level for specific situations
- Recognize environmental barriers (ex: a closed office door should not be opened and entered without knocking)
Promoting Generalization
- Perform a learned behavior in multiple settings and at multiple times (ex: have separate videos of the student requesting help at work, in the classroom, and at home)
- Show a single video to the student in different environments (ex: Capture a video at home of the student requesting help, then show the same video when the student is at work or in the community)
What materials are needed? The materials needed for video modeling are relatively inexpensive:
- Camera
 Any camera capable of recording video will work! This includes dedicated video cameras in addition to many point-and-shoot cameras, smart phones, tablets, or computer-connected webcams. For mobility and flexibility when shooting in various settings, the smaller options are recommended (dedicated or point-and-shoot cameras, smart phones). In some situations, a computer-connected webcam may be used to record directly to the computer; this is only suggested for stationary recordings where the actors can comfortably perform within view of the webcam.
- Editing software and laptop/computer/mobile device
Some point-and-click cameras offer onboard editing, allowing simple edits such as cutting video clips without the need of separate PC/Mac software. Likewise, check for apps that allow editing options when recording via smartphone.
If your camera does not offer onboard editing, simple editing software will meet your needs. There are numerous programs ranging in price from free to hundreds of dollars, but the more expensive options offer far more features than necessary for your intended purposes. When selecting editing software, you will primarily need a program that allows you to cut video clips – this means removing portions of a recording and keeping only the needed sections.
Optionally, an advanced editing feature which may be useful is the ability to use graphic overlays – this allows you to apply graphics such as green checkmarks, text boxes and thought bubbles. Whatever is chosen, set aside time to initially practice with the editing software to become familiar with the common features. You will ultimately save a lot of time in the editing phase if you are comfortable with the software.
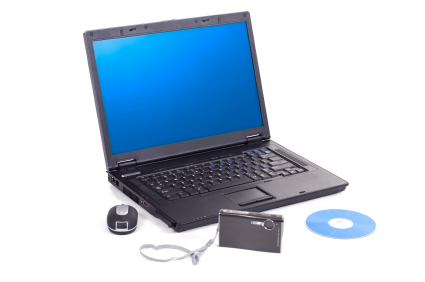
- Monitor
A monitor is used to display the video for the student. This can be on a computer monitor, TV, or the recording device itself! If video is stored on a computer or tablet, then those monitors can be used. Videos can be saved to DVD and watched on other computers or a TV. Many cameras and smartphones allow videos to be played on external monitors via mini-HDMI or USB connections. For detailed information, please refer to the instruction manuals included with your device.
Optional: Microphone on editing computer/device to allow for post-recorded narration
How to create a video model?
Step 1: Identify Target Behavior
Step 2: Plan the Scene – When, Where, Perspective, Actors, & Narration
When:
When does the skill or behavior need to occur? It may be helpful to record video at the time that the skill will be expected, such as before lunch or in the afternoon when returning from an outing. Remember that your video should show both the expected behavior and its context.
Where:
Where will the skill need to occur – in the classroom, at a community setting, or during a group activity? Based on the student’s ability to generalize locations, determining where the video will be recorded may be very important. Some individuals may better comprehend and use the video model if it is recorded in the actual setting where the skill is to be used, such as learning about merchandising procedures at the jobsite. Optionally, mock-situations may be prepared at alternate locations if the actual site is unavailable or if the student is able to generalize the skill.
Perspective:
Where will the camera be positioned to record? There is no right or wrong method for a given situation, so take liberties with setting up the video’s perspective. Here are a couple of options illustrated with the example of teaching how to confront a bully:
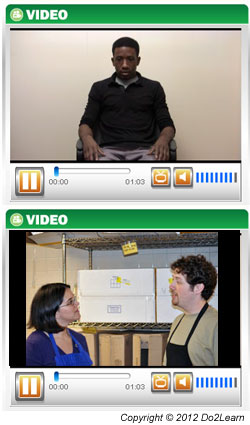
- 1st Person: Footage is captured from the perspective of the student who is learning the skill or from an actor’s perspective directly interacting with the student. (ex: from the perspective of the student while he confronts a bully, the bully looking into the lens. Think of this as though the student is actually holding the camera to record what he sees during the event.) HINT: Let the student record from 1st person if able, this may increase interest and involvement!
- 3rd Person: Footage is captured from a non-actor position that shows the whole scene. (ex: from a bystander’s perspective of a person watching someone confront a bully)
Actors:
Who will be in the video? Does the targeted skill require only an individual actor or multiple people? As noted above, the perspective will sometimes determine this. Before shooting, identify how many actors are needed, who will act in which roles, and whether or not the student will be an included actor.
Some individuals may not want to be recorded or may have issue with seeing and hearing themselves on screen. Get clear permission to do any recording of students, and be sure that the students are comfortable being recorded and watching themselves. Trust is essential.
Research has not shown a significant difference in success of video modeling when comparing “self-modeling” versus “non-self modeling.”
- Self-Modeling (Small “R” icon right next to this text that links to references area for Scott Bellini articles): Footage captures the actual student doing the task (ex: from a bully’s perspective with the actor speaking directly into the lens). The student’s motivation is a key in this decision. Some students are highly motivated watching themselves perform expected behavior on video.
- Non-Self Modeling: Footage is captured that does not include the student. This is necessary for students who do not enjoy watching themselves on video or do not wish to be recorded. Non-Self Modeling requires the use of peers or instructors as actors to illustrate the skill being taught (ex: using 1st or 3rd Person Perspective without the actor being in the scene).
HINT: It may be helpful to let the student be the cameraman to capture footage, providing the opportunity to become more comfortable with the recording process.
Narration:
Will the video include narration? Narration can be helpful by providing clear, verbal directions that explain what is happening during the video. Narrative scripts should be simple, such as “John feels relaxed after stretching” or “The noise is too loud.” When narrating, there are two options:
- Narrate while recording: This is the easiest method of narrating. It involves you narrating while actually capturing the recording, ensuring your voice is heard at the appropriate times without any post-editing. When narrating while recording, it is important that you use a planned script to avoid having to do multiple takes because you forget your lines. Try using a situational story to guide your narration!
- Add narration during editing (“dubbing”): There are many reasons why you may need to add narration after capturing the recording; perhaps the student does not like you speaking while he is acting, you realize that a narration would help but do not want to re-record an entire video, or you find use in adding narration to an old video. Whatever the reason, you can add a narration to the recording with most editing software. This requires a microphone and an appropriate editing program. Please, see the manual for your specific editing software for details.
Step 3: Record the Video
A few questions to ask before recording:
- Do you want to avoid capturing external prompts, such as verbal input from instructors?
- Do you want to capture events before the skill (antecedents) or only the isolated skill?
- Do you want to capture events that follow the skill (consequential events) or only the isolated skill?
- If capturing audio, can everyone be heard clearly? (Be sure to test the sound by doing a practice recording)
- How much footage do you need following completion of the targeted skill?
- Can you narrate and define the expected behavior while capturing the footage so that the student can listen to that description while watching the clip later?
As discussed in the next section on editing, it is okay to capture extra footage because you can cut it out when editing. For example, if verbal prompts are recorded but you are teaching independent completion of the skill, record the entire process and edit out the prompts in the next step.
Step 4: Edit the Video
- Import the recorded video onto the computer for editing. (If editing onboard a smartphone or camera, skip to Step 2)
- Launch the editing program and open the video.
- Edit the video. This is often done by “trimming” or “cutting” from the beginning and end of the video, resulting in only the desired footage. (Ex: you record 4:00 minutes of video, but only need the section between 2:30 and 3:00. You will “trim” or “cut” the beginning of the video from 0:00 to 2:29, and from the end of the video from 4:00 to 3:01)
- Add narration if desired. As noted above, this step is optional and can be avoided by recording a narration while recording the video. If you wish to add a narration at this stage, please see the manual for your specific editing software.
- Save the edited video. It is recommended that you “save as” a new file to avoid accidentally overwriting (deleting) the original video. Name the new file so that you can easily identify it (“KN requesting help”) and in a specific folder for the student’s video models (These are only suggestions but will help keep your videos organized).
- Export the video to an external hard drive, flash drive, mobile device, or DVD for viewing on a separate monitor (If the student will be viewing the video on the editing computer’s monitor, skip this step).
Step 5: Show the Video
- The student should have a quiet area to watch the video without distractions.
- If necessary, provide headphones to help reduce distractions.
- It may be necessary to teach the student to watch the video, but be careful not to create a prompt-dependent situation. The student needs to be focused on the video and not input from the instructor.
- Following viewing, the student should then practice performing the skill.
What’s Next? “Chaining Skills”
By adding steps to existing skills, you can build on an individual’s abilities to chain skills to complete more complex tasks. Again, this points to the importance of task analysis at the very beginning of the process and prior to creation of your video model. Video modeling is not the only way to chain skills, but videos offer a unique method of doing so. Skills can be chained with video modeling by editing together separate videos of various steps to form a single multi-step model. This process requires a bit more skill in editing, but combining clips is usually fairly simple with most software. For details on this and other advanced editing features, refer to the user documentation included with your editing software.
Example #1: Recognizing and coping with stress
Kristina does well at work, but she sometimes feels stressed if she gets behind in her schedule. Currently, Kristina copes by covering her ears or by rocking slightly. She has practiced recognizing signs of stress through focused body emotional exercises and a simple situational story. She has practiced relaxation exercises at scheduled times at home including counting to twenty and taking several deep breaths. Following the use of a situational story outlining the steps to take when getting stressed, Kristina will use a video model to demonstrate the relaxation process while at work.
Example #2: Approaching a group in the break room
Matt struggles to join a conversation in the hall, at break, and after work. He has practiced using a written topic card in a safe environment with a teacher and selected peers. He has practiced joining a conversation in this safe environment, listening to the topic that peers and teacher are discussing, then making a comment related to the topic. He has then practiced checking his topic card and bringing up a new topic when there is a pause in conversation. A video model may be used to help Matt review the skills necessary to join his coworkers in the break room.
3rd Person Perspective may capture the entire scene, including Matt entering a room with several “workers” present. The video captures the group discussing a news event. Matt walks up to the group and listens. The narrator describes only the key elements of the context (“Matt is listening to the group. He will try to comment on the topic.”). The video captures Matt’s comment (“I did not hear about that. Was it on the news this morning?”). After the response, there is a short pause and Matt checks his topic card and brings up another subject. The narrator labels Matt’s expected behavior (“Matt brings up a topic when there is a pause. He is doing a great job of being a friendly co-worker at work.”). The narration is brief and to the point. This video model labels only what is expected of Matt.
With time and success, the editor and narrator may add new video to practice additional skills. More than likely, a different video will be developed to deal with facial reactions that show boredom or disapproval and how Matt can react to repair the conversation. A new video can also be created to help Matt identify a ‘closed’ clique vs. an ‘open’ group.