
Picture schedules are used for individuals who can understand and respond to more symbolic representation than objects but cannot independently use a written schedule. In other words, picture schedules are used for individuals between the level of an object and written schedule. The individual should be able to easily understand the meaning and representation of photographs, icons, or drawings.
For more information about how to decide whether a picture schedule is most appropriate for your student, click here.
Devising and using a picture schedule:
- A picture schedule is used to support independent transitions between places.
- A picture schedule will vary widely depending on the learning style of the individual, and there are many ways to make and present a picture schedule.
- Each picture, photo, or icon (item) represents one place or event.
- Pictures can be in the form of photographs, icons, or drawings, depending on what is most meaningful for the individual.

Including a simple word or phrase beneath the picture provides additional clarity to some emerging readers. Some individuals benefit from an actual photograph of the activity or area that has been taken with a digital camera and printed out. Other realistic photos can be found using such search engines as Google Images. For other individuals, icons make more sense than photographs. Icons can be obtained via the View2Do program. For some individuals, a simple hand-drawn picture is enough. Using drawings and quick sketches is sometimes the most practical and efficient approach. - Consider the scope of the schedule.
Depending on how much information the individual can handle at a time, the schedule may include just a few pictures to represent a few places, a half-day of transitions to different spaces, or a full day.
Three schedules as examples:
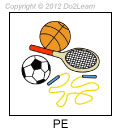
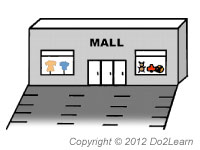
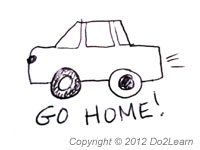
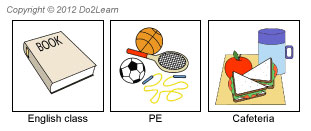
Markel’s schedule:
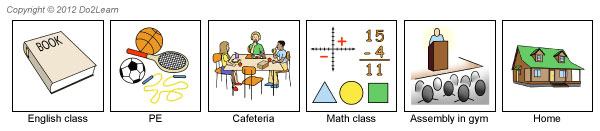
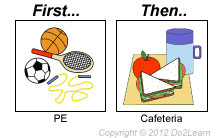
Ali’s schedule:
Jose’s schedule:
- Pictures can be presented in various formats depending on what makes sense to the individual.
Assess which system works best for your student. Just because one individual in your classroom or workplace uses a particular picture schedule format, that does not mean that all of your students or employees would benefit from that same format.
Here are a few suggestions on how the picture schedule might be formatted:
- Attach laminated pictures to a strip of poster board or other durable surface. Use Velcro, large paper clips, or magnetic tape to attach the pictures.
- On a piece of paper and attached to a clipboard.
- In a flip-book format.
- In electronic form, on a mobile device.
- Arrange the pictures one after another, either horizontally or vertically. If you are using a flip book format, the first event should be depicted on the first page of the book.
The pictures should be in a presentation that fits the individual . In other words, assessment should occur to determine whether the student will move methodically in a top to bottom or left to right fashion when choosing the next item on his schedule.
- Use a “check schedule” card to let the student know it is time to transition and to check their schedule.
 The check schedule card can be presented to the student at the completion of one task, and it indicates that the student needs to go to their schedule to find out what is next. When an instructor provides this “check schedule” card, this involves a person and is thus a personal prompt. Care must be taken to fade personal prompts over time. Note that the ‘check schedule’ card can be the last card or cue on the individual’s to-do list. The concept of “check schedule” might be depicted with a checkmark icon, an image of the actual schedule, etc. Select a visual representation that will be most understandable to the student. When the ‘check schedule’ cue is part of the environment or the to-do list, this reduces dependency on personal prompts.
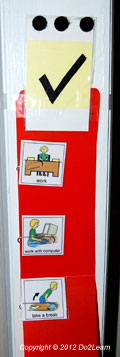 When the student arrives at their schedule, there should be a designated place for them to put the check schedule card.
The beginning point (top of a vertical arrangement, or far left position on a horizontal arrangement) of the schedule is usually a good place for the “check schedule” card. Velcro or a pocket is an effective way to secure the card.
The student then references the next picture card in the sequence to determine where to go next.
- Consider how the individual will manipulate the schedule.
Active manipulation of the schedule helps with comprehension of the meaning of the symbols on the schedule. Will the student remove the item, take it with him to the next space, and match it to a similar item in that area with Velcro? Will he take it with him and put it in a pocket in the area? Will he flip it over on the schedule and go to the next place (only a good idea when the individual consistently moves from place to place without needing the visual card with him)? Will he check it off or cross it out on the schedule?
- The individual should understand that they are making progress as each picture card on the schedule successively disappears.
here are many ways to show the progression of completing the activities:
- The individual can mark off the picture when they are done with an activity.
- The individual can also turn the picture card over to symbolize that the activity/place is finished.
- The individual can place the picture card in a pocket that is attached to the schedule.
- The individual can carry the actual picture card to the next activity. The individual then will match the card to a picture card with Velcro or place the picture card in a pocket /container at that area.
Guiding questions to consider: |
|
Picture Schedules
|
