|
How to Use
 Overview Overview
schedules
Overview
Reminder Strips
Other Layouts
Physical Variations
Story Strips
Overview
Behavior
"First.../Then..."
Safety Skills
Reciprocal Communication
Overview
Making Requests
Making Choices
More Ideas

|
 |
physical
variations
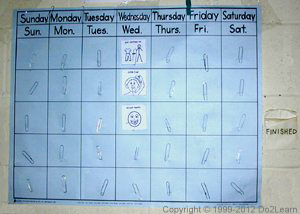
Displaying the schedule:
- mount picture cards to poster board,
use single strip or full size with days of the week grid
- mount cards on a clipboard hung on
back of doors or carried
- carry cards in 3 ring binders
- mount cards in photo albums
- use manila folders with picture cards
attached inside
Some of these are more permanent for home or classroom use. Others
are smaller and more portable.
Protecting
the picture cards and schedules:
- cover with clear contact paper
- cover with clear packing tape
- cover with overhead transparency
sheets
- laminate
Covering picture cards and forms will protect them and make them
more stable. You can write on any of these surfaces with overhead
transparency markers that will wipe off with a little glass cleaner.
Tip: Print out picture cards and forms and cover with clear
contact paper before cutting them.
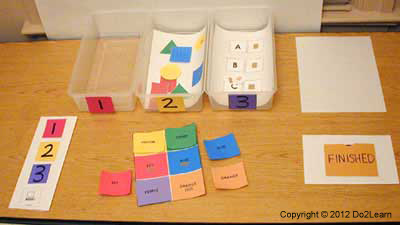
Transitioning between activities:
- cross or check off picture as activity
shown on picture card is completed
- move picture to a finished container
when activity on picture card is completed
- turn picture card over on chart when
completed
- take completed picture card to next
activity area when it is finished
|
Finished baskets and envelope |
Examples of a "Finished" container:
- plastic basket
- shoe box
- coffee can
- envelopes (cut long size in half
and use both sides)
- pockets
|